
Your cart is currently empty!
ZetaBIM is a Revit point cloud plugin for scan-to-BIM teams. It turns a laser scan into an as-built Revit model with tools that measure the point cloud for you, and then checks the model against the scan before you deliver it. This page walks through the whole workflow and links to a step-by-step guide for every tool.
Why use a Revit point cloud plugin
Revit can link a point cloud and let you snap to it, but every wall, beam, pipe and floor is still drawn and sized by hand. On a large survey this means days of measuring sections and guessing sizes. A Revit point cloud plugin closes that gap:
- Sizes come from the scan. Wall thickness, beam sections and pipe diameters are measured for you.
- Types are created for you. A new type is made for each measured size, or an existing one is reused.
- Fewer clicks. One click on a wall face creates the wall; two corners create a door or window.
- Quality you can prove. The model is compared with the scan point by point, so you can show your client how close it is.
| Task | Revit alone | Revit with ZetaBIM |
|---|---|---|
| Wall from a scan | Draw it, measure the thickness in a section, pick or make a type | Click the wall face |
| Door or window | Measure the opening, find or make the type, place it | Pick two corners, check the preview, click Create |
| Pipe or duct | Measure the diameter, draw the run | Click the run |
| Uneven floor or site | Add shape points one by one | Measure the surface, then shape the floor or terrain in one step |
| QA against the scan | Visual checks in sections | Every point colored by its distance to the model, with a report |
Step 1: Prepare the point cloud in Revit
- Index the scan in Autodesk ReCap and link the RCP or RCS file into your Revit project.
- Set up levels and crop views to the area you are working on.
- Make the scan easy to read:
- Color Mode PCL switches every scan in the view to elevation, intensity, RGB, normals or a single color.
- Show/Hide PCL and Show/Hide CAD turn the scan and CAD on and off in one click.
- Cloud Image creates a sharp, true-scale image of a plan, elevation or section to trace like a drawing.
Step 2: Model architecture from the scan
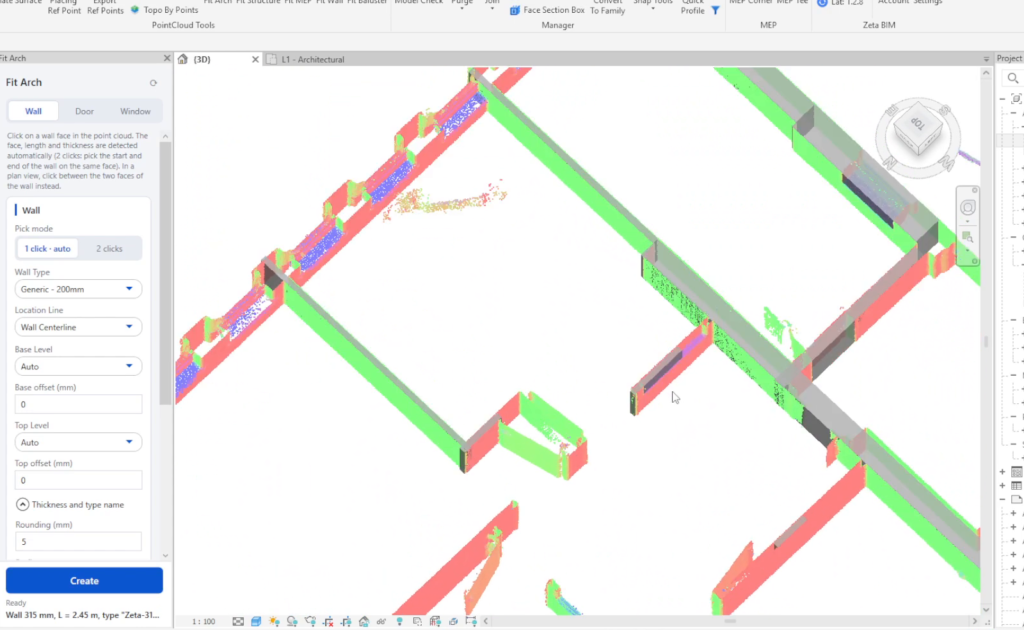
- Fit Arch models walls at the measured thickness, and doors and windows from two picked corners, with a preview of each opening over the scan.
- Fit Wall draws walls in plan from three picks, including arc walls and chained corners.
- Fit Baluster places balusters on a railing at the real spacing.
- Convert To Family turns in-place elements into reusable families.
- Quick Profile Creator makes mullion, sweep and edge profiles from detail lines.
Step 3: Model structure and MEP from the scan
- Fit Structure creates beams and columns at the measured section, for concrete and steel members.
- Fit MEP creates pipes, ducts, cable trays and conduits with the fitted size and standard sizes.
- MEP Corner / MEP Tee connects the runs with elbows and tees.
- Auto Join and Allow/Disallow Join keep joins clean and correct.
Step 4: Model floors, roofs and terrain from the scan
- Calculate Surface measures the surface on a grid and places reference points at the real heights.
- Placing Ref Point adds points at edges, low spots and steps; Optimizing Computed Points explains how to refine them.
- Shape the element with Floor By Points, Roof By Points or Topo By Points.
- Snap Floor lays paths onto the terrain and Snap Family drops families onto floors and sites. Export Ref Points copies a shape from one element to another.
Step 5: Check the model against the point cloud
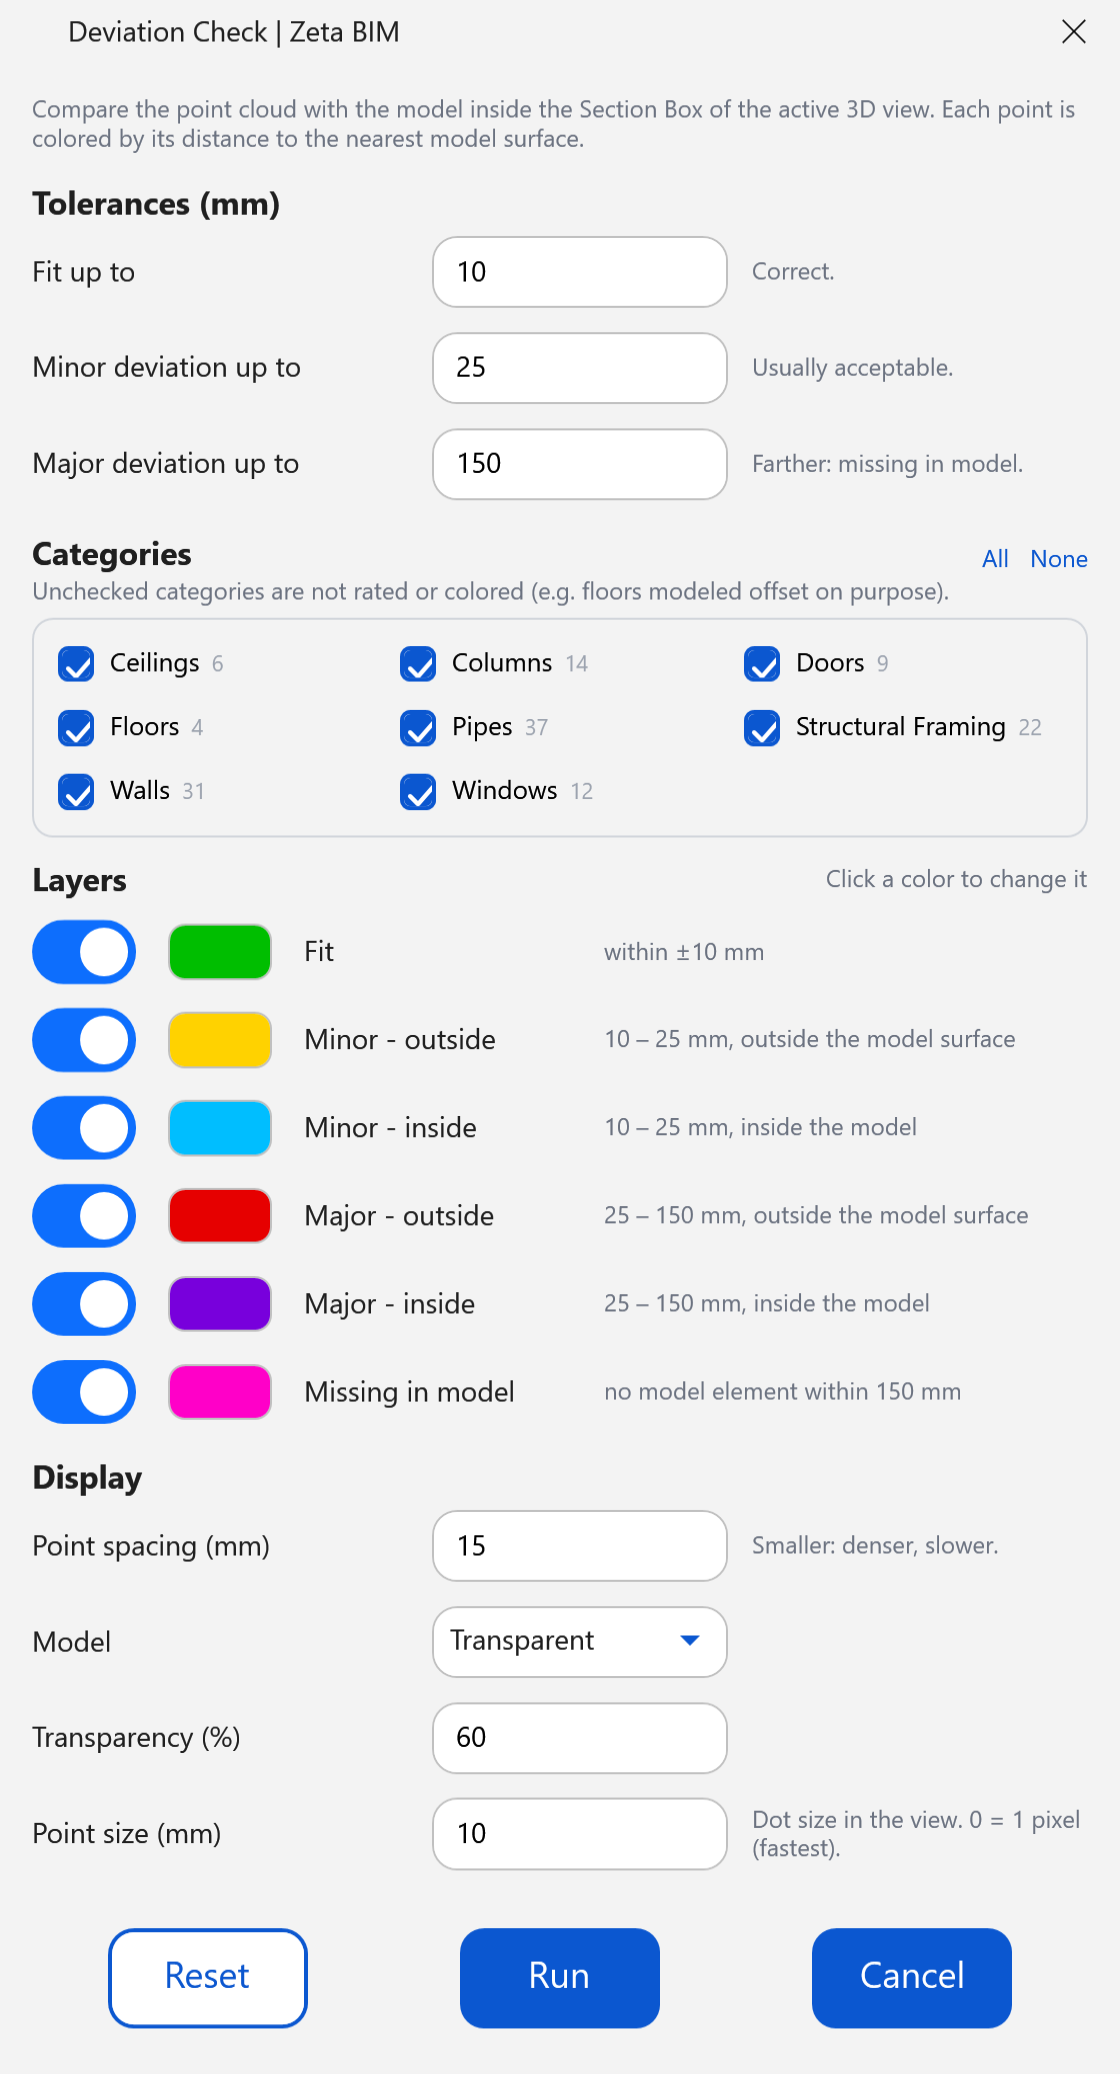
- Deviation colors every scan point by its distance to the model and lists the worst elements, with live updates while you fix them.
- Cross Section, Parallel Section and Face Section Box open the right view of any element in one click.
- Model Check captures, marks up, assigns and tracks issues with your team.
Step 6: Deliver a clean model
- Rename Types gives every family type a consistent, size-based name.
- Cleanup ZetaBIM Data removes reference points and tracing images.
- Purge CAD removes old CAD imports and links.
- Filter Material and Material Face help check materials before handover.
Set up once
A few tools need to know the parameter names used in your families, for example a door width called Rough Width. Enter them once in ZetaBIM Settings, where you also choose the output folder for generated files.
Learn more
- How to model point cloud in Revit: a step-by-step guide from the linked scan to the finished model.
- Scan to BIM workflow: the stages of a project, from the brief to a checked as-built model.
- Point cloud slow in Revit? Ten practical ways to keep Revit fast with large scans.
Supported versions and files
- Revit: 2021, 2022, 2023, 2024, 2025, 2026 and 2027.
- Point clouds: any scan linked into Revit as RCP/RCS from Autodesk ReCap.
- Units: metric and imperial projects.
FAQ
What is the best Revit point cloud plugin for scan to BIM?
It depends on what you model. ZetaBIM covers the core of scan-to-BIM in one add-in: architecture, structure, MEP, floors and terrain, plus QA against the scan, all inside Revit.
Can Revit model walls from a point cloud automatically?
Not by itself. Revit shows the scan and lets you snap to it, but you size and draw each element. A Revit point cloud plugin measures the scan and creates the element for you.
Does ZetaBIM need another program besides Revit?
No. Everything runs inside Revit. You only need Autodesk ReCap to index the raw scan into RCP/RCS.
How accurate is the model?
Use Deviation to measure it: every point of the scan is compared with the model and the report shows the share within your tolerance.
How do I get ZetaBIM?
Download it from the download page, install it and sign in with your ZetaBIM account in Revit.
Video
Get ZetaBIM
ZetaBIM is a Revit plugin for scan-to-BIM teams. Download ZetaBIM to try it, browse more ZetaBIM tutorials, or watch the videos on the ZetaBIM YouTube channel.