Your cart is currently empty!
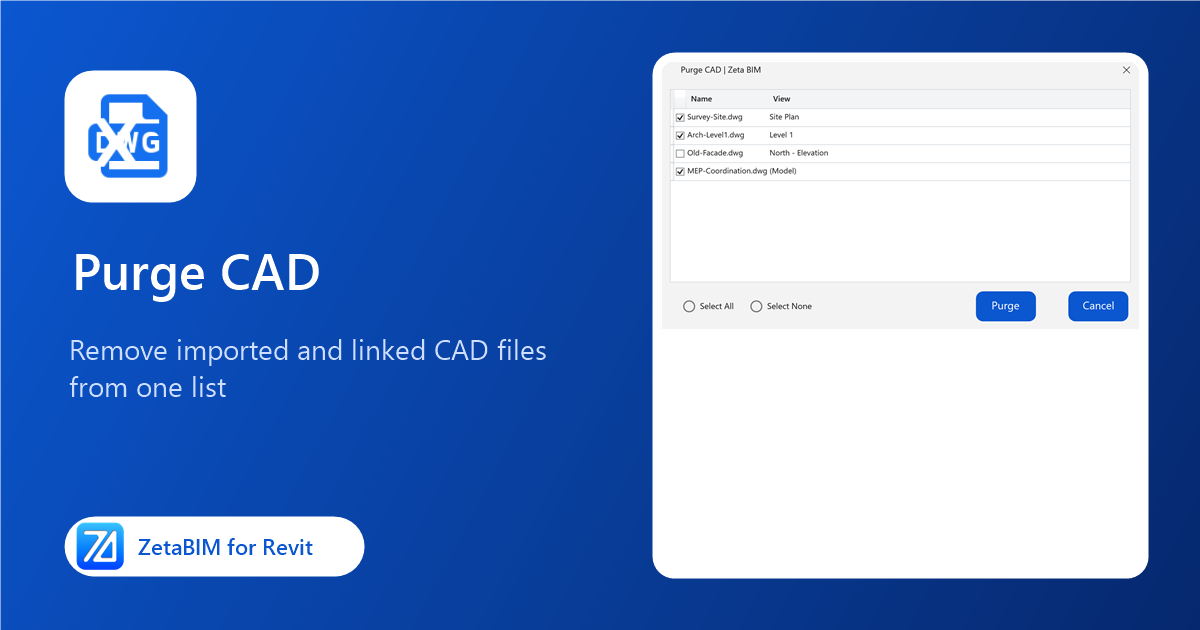
Old DWG imports pile up in a project, slow it down and are hard to find. Purge CAD lets you purge CAD in Revit from one list, with the view each file sits in.
Why purge CAD in Revit with this tool
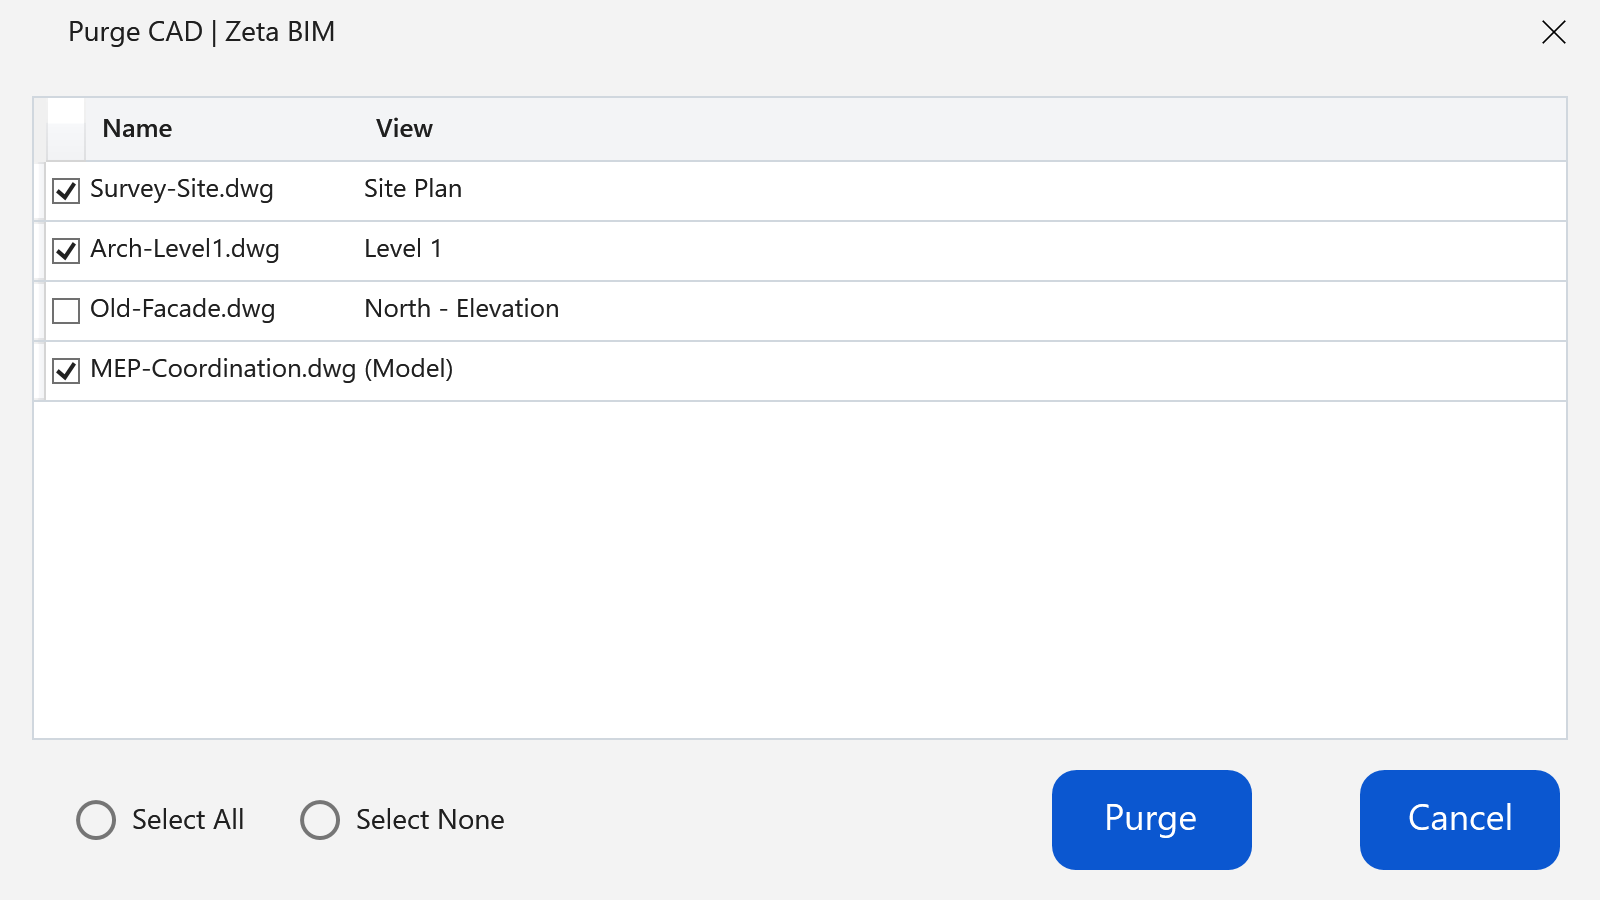
- Everything in one list. Imported and linked CAD files, with the view they were placed in, or (Model) when they are in all views.
- Pinned files too. Pinned CAD is unpinned and deleted, so nothing is left behind.
- Lighter project. Removing unused CAD reduces file size and speeds up views.
Steps
- Click Purge › Purge CAD (Zeta BIM tab › Manager).
- Tick the CAD files to remove. Use Select All or Select None to change the whole list.
- Click Purge.
Good to know
- The removal is one step, so a single Undo brings everything back.
- Only CAD is listed; other links such as Revit models and point clouds are not touched.
- To hide CAD for a moment instead of deleting it, use Show/Hide CAD.
- To remove ZetaBIM helper data such as Cloud Images, use Cleanup ZetaBIM Data.
FAQ
Is the DWG file deleted from disk?
No. Only the import or link inside the Revit project is removed.
Why is a CAD file listed with "(Model)"?
It is placed in the model and shows in all views, not only in one view.
Related
Video
Get ZetaBIM
ZetaBIM is a Revit plugin for scan-to-BIM teams. See the complete guide to the Revit point cloud plugin workflow. Download ZetaBIM to try it, browse more ZetaBIM tutorials, or watch the videos on the ZetaBIM YouTube channel.
About The Author