Your cart is currently empty!
Renaming dozens of door or window types by hand is slow and error-prone. Rename Types lets you rename family types in Revit in one go, using their own sizes.
How to rename family types in Revit with a pattern
Rename Types gives all types of a family consistent names built from their own parameter values, for example a door type 900 wide and 2100 high becomes 900x2100mm. It is useful after loading families from different sources, or when a client standard asks for size-based type names.
Steps
-
Optional: select an element (or a type in the Project Browser). Its family is chosen for you.
-
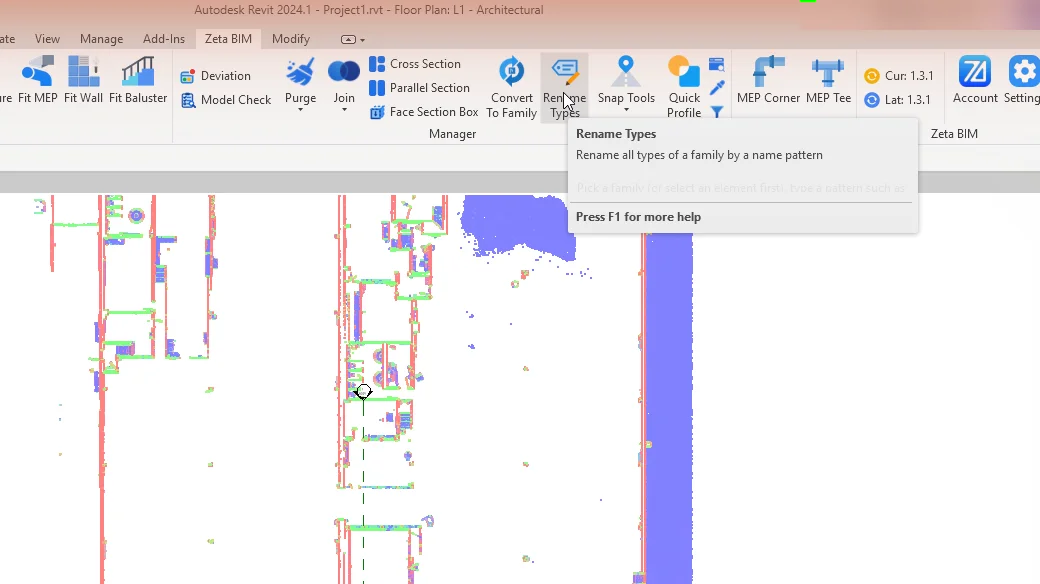
Click Rename Types (Zeta BIM tab › Manager).
-
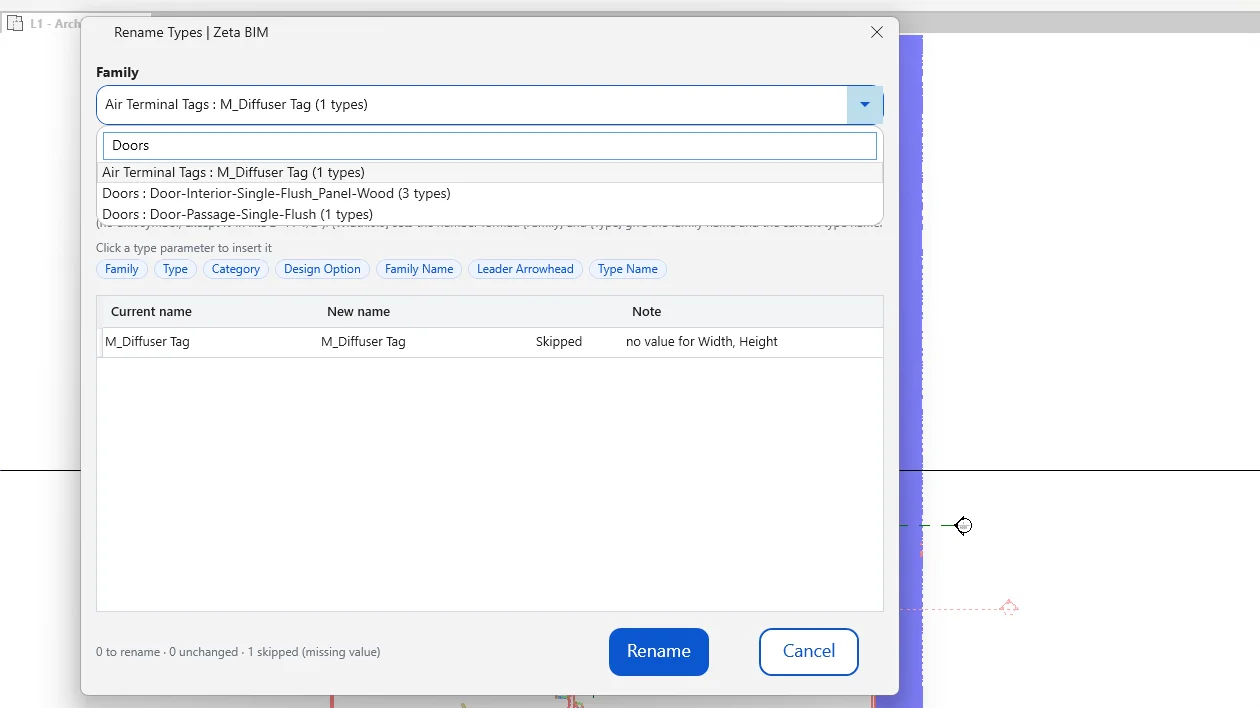
Pick the Family. Type in the box to find it quickly.
-
Write the Name pattern, or click a parameter chip under it to insert it.
-
Choose the Length unit.
-
Check the preview: current name, new name and a note for each type.
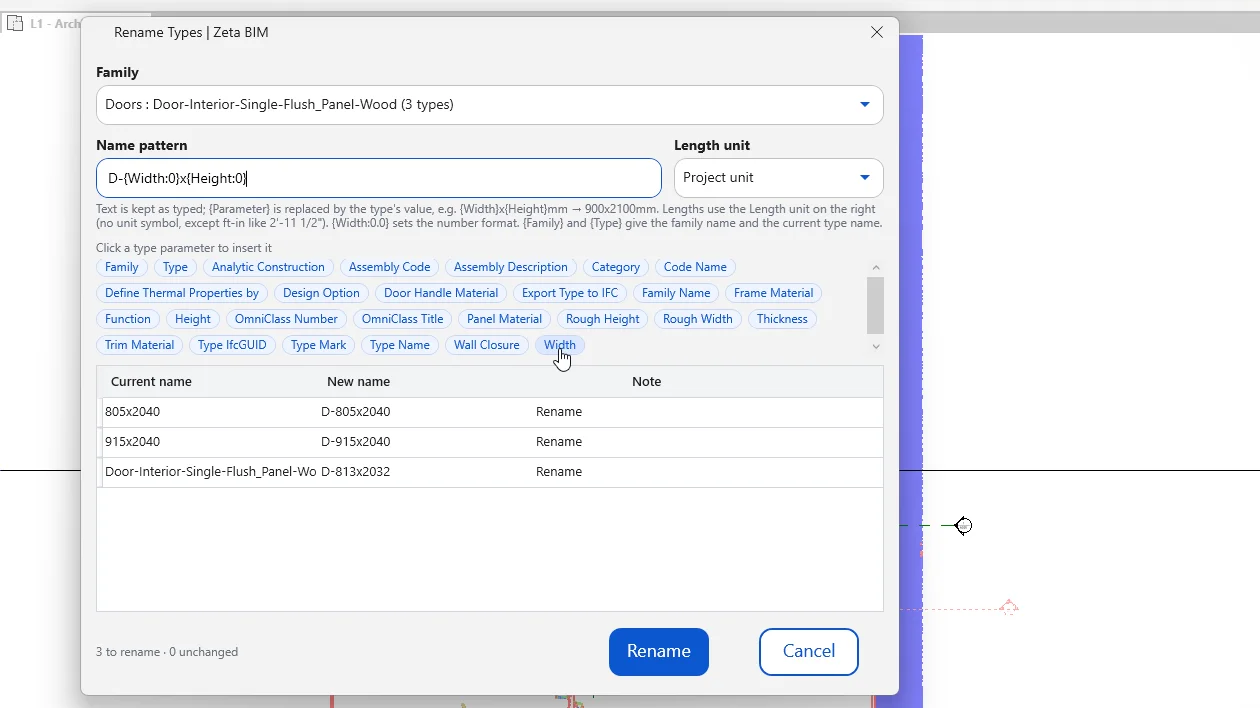
-
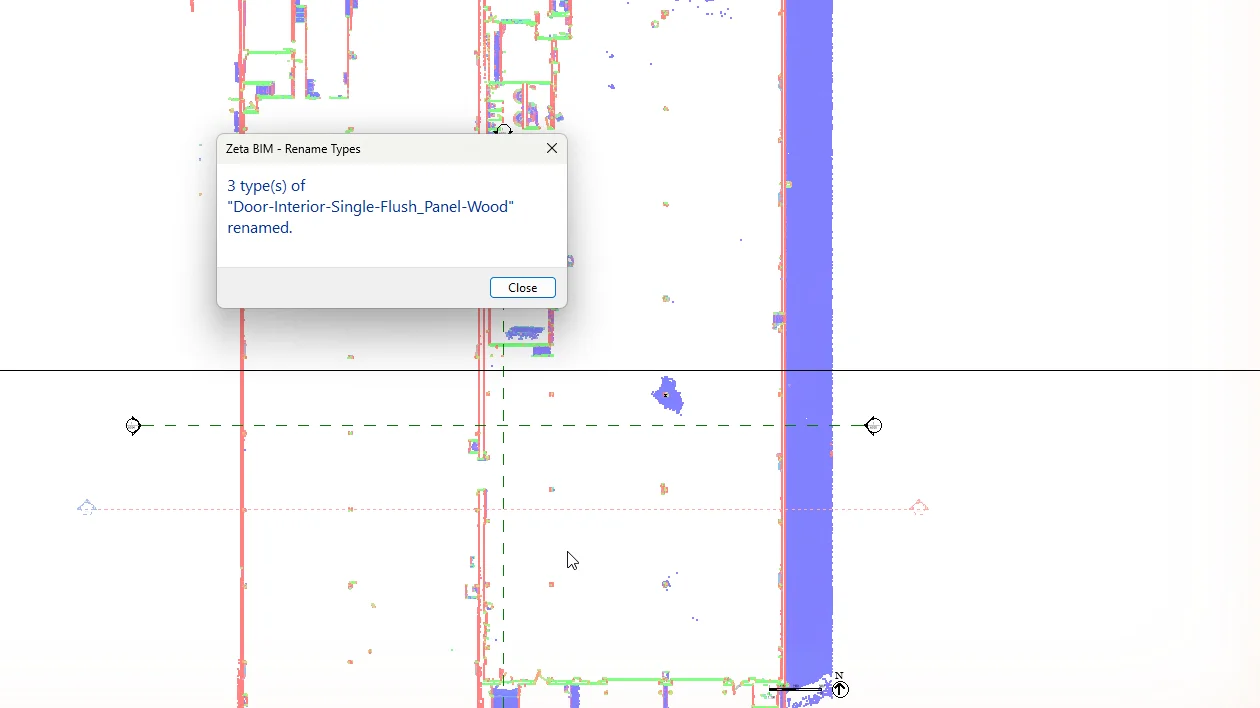
Click Rename. A message confirms how many types were renamed.
Name pattern
| You type | Result for a 900 × 2100 door |
|---|---|
{Width}x{Height}mm |
900x2100mm |
D-{Width}x{Height} |
D-900×2100 |
{Width:0.0}x{Height:0.0} |
900.0×2100.0 |
{Family} {Width} |
Single Flush 900 |
- Text is kept exactly as typed; is replaced by the type’s value.
- and give the family name and the current type name.
- sets the number format.
- Lengths are written without a unit symbol, except feet-inches.
Length unit
Project unit, mm, cm, m, ft (decimal), in (decimal), ft-in like 2'-11 1/2", or ft in without the dash like 2' 11 1/2".
Good to know
- Types whose new name would be the same are marked Unchanged.
- Types with an empty parameter value, or a name with characters Revit does not allow, are Skipped and keep their name.
- If two types would get the same name, the second one gets " (2)".
- Types can swap names with each other safely.
- All renames are one step, so a single Undo restores the old names.
Related
Get ZetaBIM
ZetaBIM is a Revit plugin for scan-to-BIM teams. See the complete guide to the Revit point cloud plugin workflow. Download ZetaBIM to try it, browse more ZetaBIM tutorials, or watch the videos on the ZetaBIM YouTube channel.
About The Author